How Can We Help?
Getting Started with Show The Way
Step 1: Reach out to your Regional Administrator for an Outreach Account in your local campaign.
Step 2: Download the app from Google Play or the App Store from Apple, or access on the web at www.showtheway.org.
Step 3: Login with your account credentials. Use the Forgot Password link the first time to create your password.
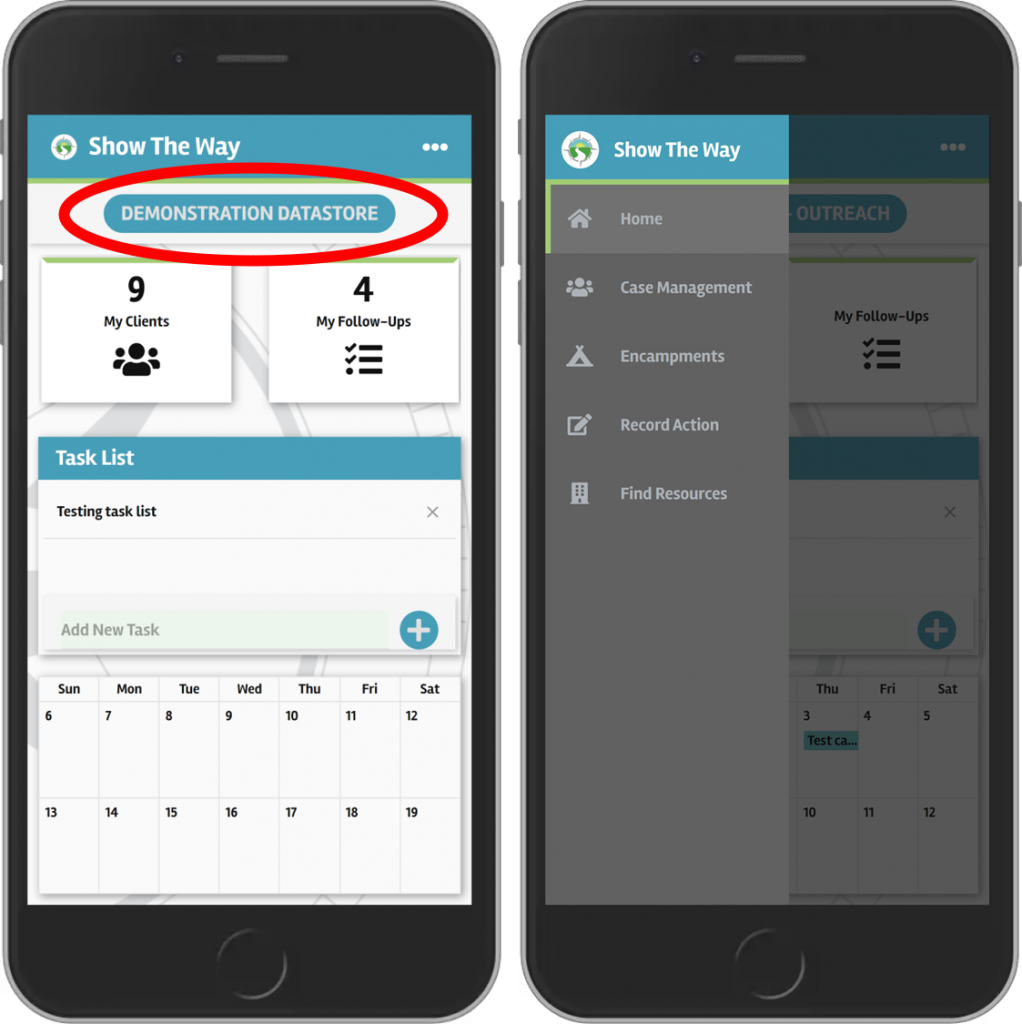
You should be automatically connected to your local Datastore (see the name at the top of your screen). A Datastore is the container for locally collected data; this data is accessible by logging in to your account in Show The Way, or by admins logging in to the Regional Command Center. If you see a list of Datastores and aren’t sure which one you should select, reach out to your administrator.
Once you’re connected to the correct Datastore, click on the Show The Way icon in the top left, or swipe from the left to access any of the four main features of Show The Way: Case Management, Encampments, Record Action, and Find Resources.

Here you can add clients, record interactions, and log client level data on surveys. Each interaction is tied to the location of the GPS on your device; you’ll be able to analyze that location information over time.
Here you can create and access existing outdoor encampments. Each encampment can have a photo attached to help identify the location between team members; they will also be noted on the map with a pinpoint, a name, and a color indicating if they are active. Clients can be assigned as staying at encampments (see this KB article for the full steps).
Here you can log information that isn’t tied to a specific client record or encampment. Some communities use this to log known locations, or for asset tracking (i.e., if they only want to know the number of coats or blankets distributed, rather than to whom they were given).
Here you can access the Resource Directory. The Resource Directory will show local resources based on your current location. You’ll be able to click on specific projects and see their information such as website, phone number, operating hours, get directions, etc. This information can be sourced from HMIS and integrated into Show The Way using the Regional Command Center. Projects are added to your local campaign, and can be edited and updated either within the Command Center or the app.
At the top right, you’ll see three dots. This is where you can access the side menu area, which contains My Settings and Account, and where you can Sign Out.
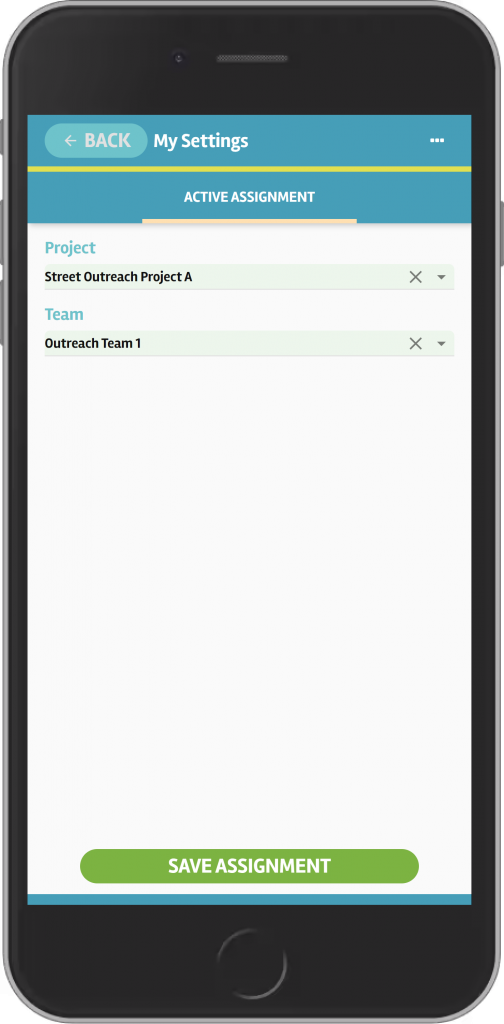
My Settings is where you will access your Active Assignment for your Project and Team. If you are assigned to multiple projects (such as a PATH funded project and an ESG funded project), you’ll want to switch between those as needed. The Active Assignment ties all data that is entered to that project, so it’s critical to ensure that the correct Project is Active.
Account is where you can access your profile information, such as name, email, and phone number. You can make any needed updates and save them here. You can also change your password, if needed.

The Active Assignment ties all data that is entered to that project, so it’s critical to ensure that the correct Project is Active.
